

Being an avid DIYer, there's no way we'd simply buy a set of pre-made cornhole boards. That'd be too easy. We'd much rather spend nearly the same amount of money on lumber and devote a whole Saturday, plus a few more hours over the next week to making our own set. Some of us just enjoy the scent of freshly sawn lumber. Grab your circular saw, jig saw, router, tape measure, pencil and let's get started.
Materials
After checking our stash of leftover lumber for usable pieces, we headed down to the local lumber yard to get the rest of the supplies we didn't already have on hand. Checking the rules and ten internet forums for the best practices in board making, we decided to make our set using 3/4" hardwood plywood and 1x3 common boards. The plywood was leftover from a past project, and the 1x3 boards were chosen to keep weight down and meet the 3-4" front edge height rule. And common boards are much cheaper than the prime quality ones. This isn't fine cabinetry after all! Grab a pile of screws leftover from other projects, some carriage bolts for the legs, paint, stain, sandpaper, and a water bottle (stay hydrated!). It's time to start making!

Build It
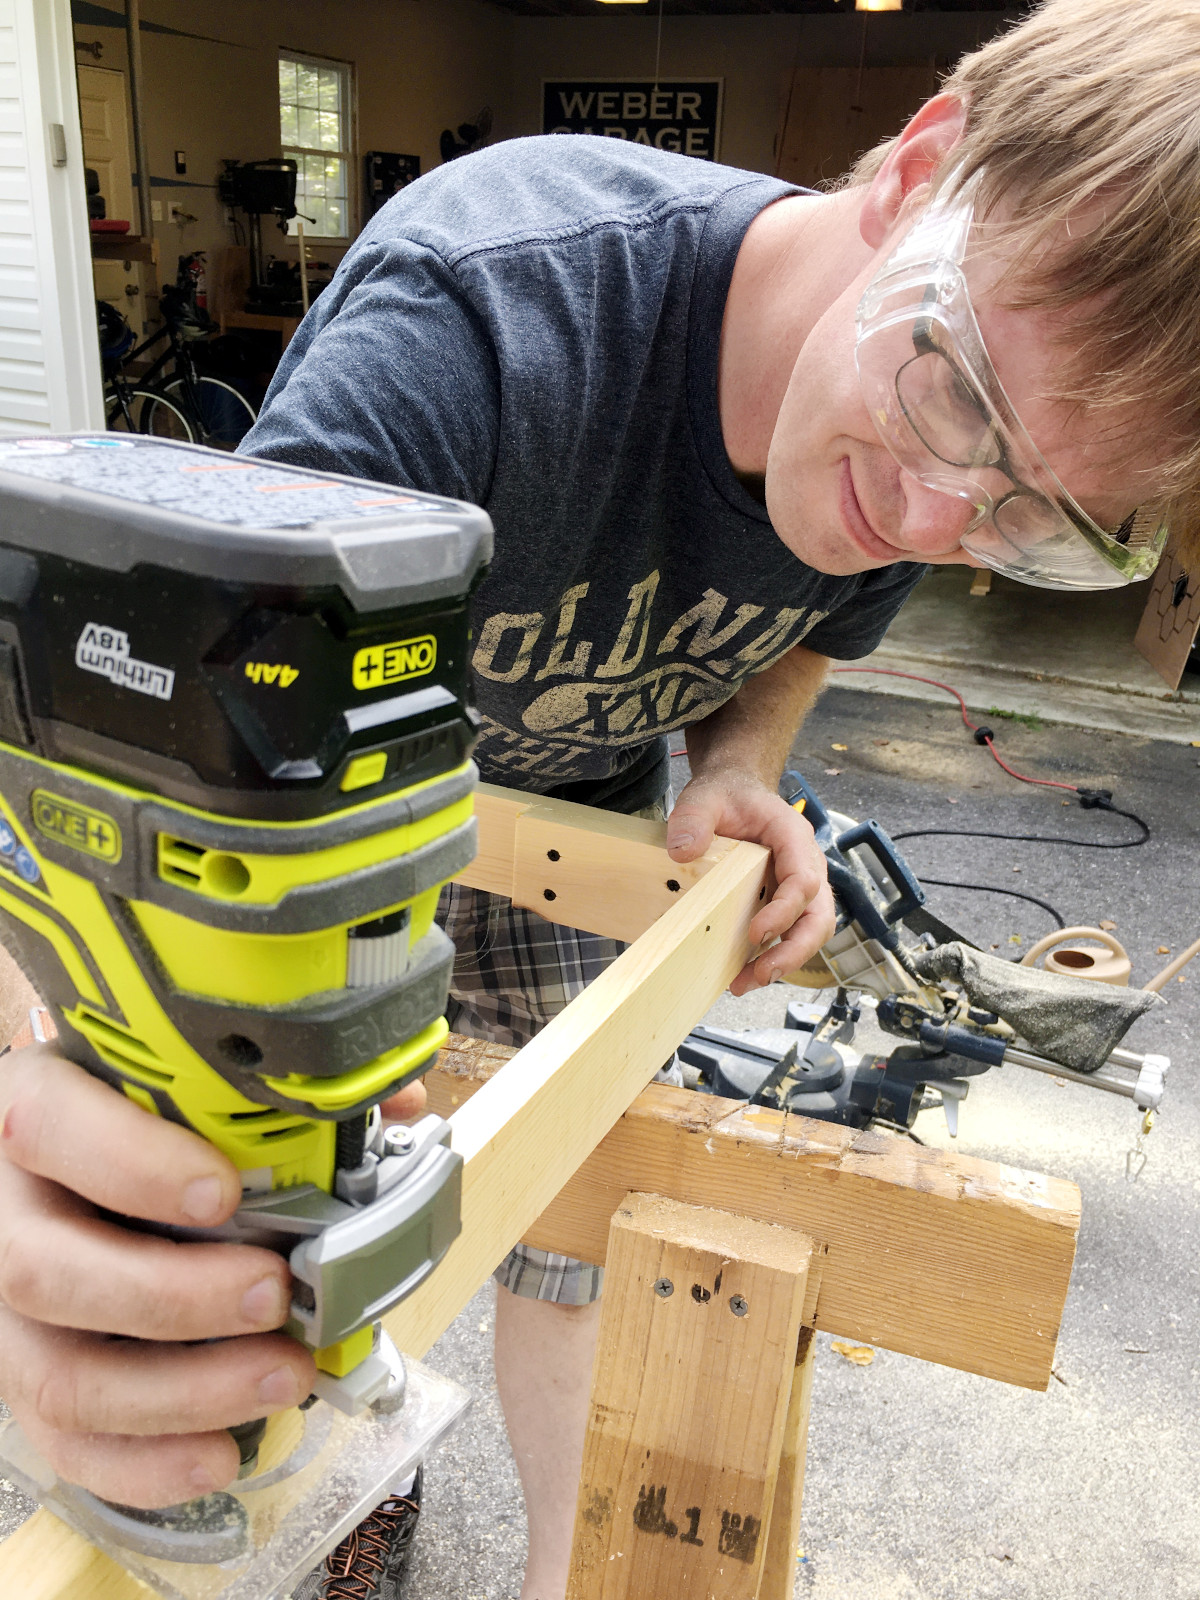
Building the boards isn't too complicated. The tops are 2'x4' rectangles with a 6" diameter hole centered 9" below the top edge. Then the 1x3 frame supports the top, and legs fold down to hold the back edge at 12" above the ground. We made the frames about 1/2" smaller than the tops to ensure the frame wouldn't be bigger than the top. A little tip we picked up, probably from Moss Boards' YouTube videos. We're not perfect with the power tools, so knowing where to intentionally add tolerances is important. Don't forget to account for the board thickness when cutting the boards to length!
Rather than buy and wrestle a huge 6" hole saw or settle for a wonky handheld jigsaw hole, we made a jig and used the router to cut the holes. We then used a 1/8" round over bit to smooth all the edges and hit everything with 220 grit sandpaper for a few seconds. The boards were coming together! After everything was cut to size, the pieces were glued and screwed together. This was probably the end of Saturday, and we let the glue dry overnight.
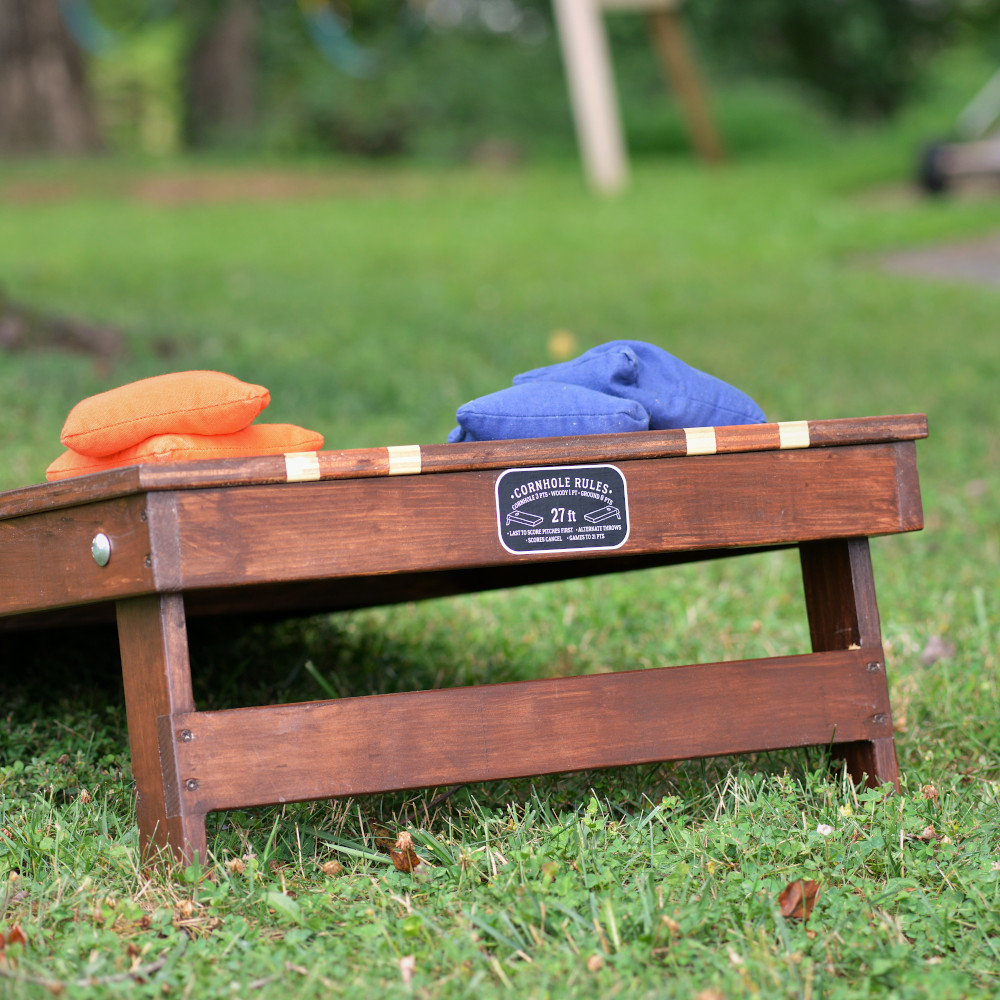
Next, it was time for some color! To create the stripe pattern, four strips of painters tape were carefully applied to the boards for the natural color stripes. Most of the boards were stained using hickory color gel stain, while the orange stripes are a combo of orange acrylic paint mixed into the hickory gel stain. After all the stain dried, the tape was removed and a couple coats of polyurethane were brushed on.
Finishing Details
While the paint was drying, we headed over to Etsy and found a set of bags we liked. We chose a set of the cotton duck canvas bags filled with resin beads so they'd be more weather resistant. Then we reached into our own store and applied a pair of cornhole rules stickers. When friends come over that haven't played before or we simply need to refresh our memory after the winter, these simple rules get us going quickly. For backyard casual play nobody is concerned about the nuances, we just need to remember how far apart the boards should be placed, and how to score the game.
Final Thoughts
Remember that at the end of the day, cornhole is just a game. You started playing the game to have fun spending time with friends and family. Competition is great, but it's the relationships you build through the competition that matter more than winning or losing. Get out there and have some fun!
-
 Save the Manuals Sticker
$1.95
Save the Manuals Sticker
$1.95
-
 VW Cup Holder - Beetle 68-77
$48.00
VW Cup Holder - Beetle 68-77
$48.00
-
 No Punch Backs Sticker
$2.45
No Punch Backs Sticker
$2.45
-
 VW Cup Holder - Beetle 58-67
$48.00
VW Cup Holder - Beetle 58-67
$48.00
-
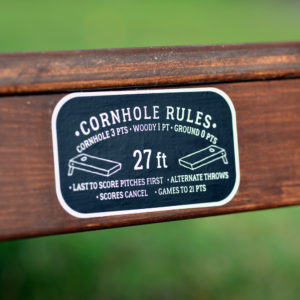 Cornhole Rules Stickers
$5.45
Cornhole Rules Stickers
$5.45